Product Sync Pro – Documentation
This tutorial will describe how to install and set up Product Sync for WooCommerce. The tutorial applies to both Free and Pro versions.
There are six subjects which we will go through:
- Installing the plugin
- Creating API keys for WooCommerce REST API
- Settings
- Syncing
- Report page
- Pushing all products
1. Installing the plugin
First step is to install the plugin. It’s installed just like any other WordPress plugin.
- Download the plugin zip file
- Go to WordPress admin > Plugins
- Click Add new and Upload plugin
- Choose the downloaded zip file and upload it
- Activate the plugin
You will need to install the plugin on all sites you want to sync.
1.1 Upgrading from Free to Pro
Upgrading from Free to Pro version is really simple:
- Activate Pro version
- Deactivate Free version
All settings will be preserved and Pro version works right away.
2. Creating API keys
Product Sync uses WooCommerce built-in REST API for communication between stores. First you will need to create API keys in all stores.
- Go to WooCommerce > Settings > Advanced > REST API > Add key
- Enter a description, select a WordPress user and set permissions to Read/Write
- WordPress user should have necessary permissions to edit products, for example Administrator
- Take note of consumer key and secret
Repeat the steps for all stores.
3. Settings
Settings are located in WooCommerce > Settings > Product Sync.
- Go to WooCommerce > Settings > Product Sync
- Click Sites > Add new
- Enter the following settings for the site
- URL – URL of the other store, for example https://store-a.com
- API Key – consumer key of the other store you created in the previous step
- API Secret – consumer secret of the other store you created in the previous step
- Mode – whether to sync all products automatically or select product by product
- Fields – which fields to sync
- Click Check credentials to ensure they are correct
- Save settings
One-way vs two-way syncing
Syncing works one-way if you do the settings on one site only. If you want to sync two-way, repeat steps for the other stores.
4. Syncing
Product Sync can sync products three ways depending on the settings. Products are matched by SKU between sites so make sure you have set SKUs for products.
1 – Automatic mode
If you selected Automatic mode in the settings, all products which have SKU are synced.
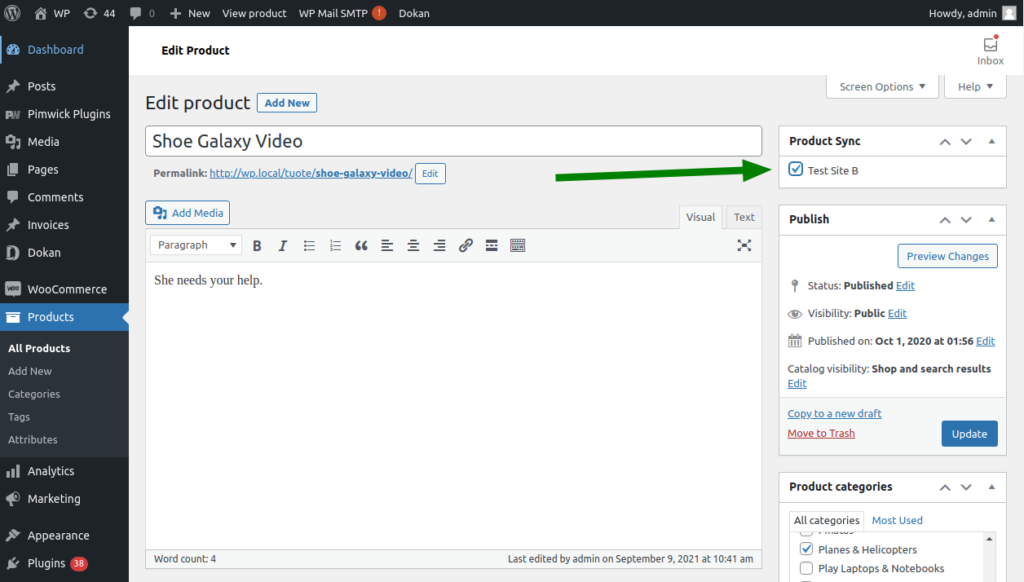
2 – Manual mode
If you selected Manual mode in the settings, only products you select are synced to the other site. Selection is done in the product edit page:

3 – Manual mode – push manually
If you select Manual mode in the settings and don’t select any products to be synced, you can still push products in the report page. This way products are only synced when you push them manually.

5. Report page
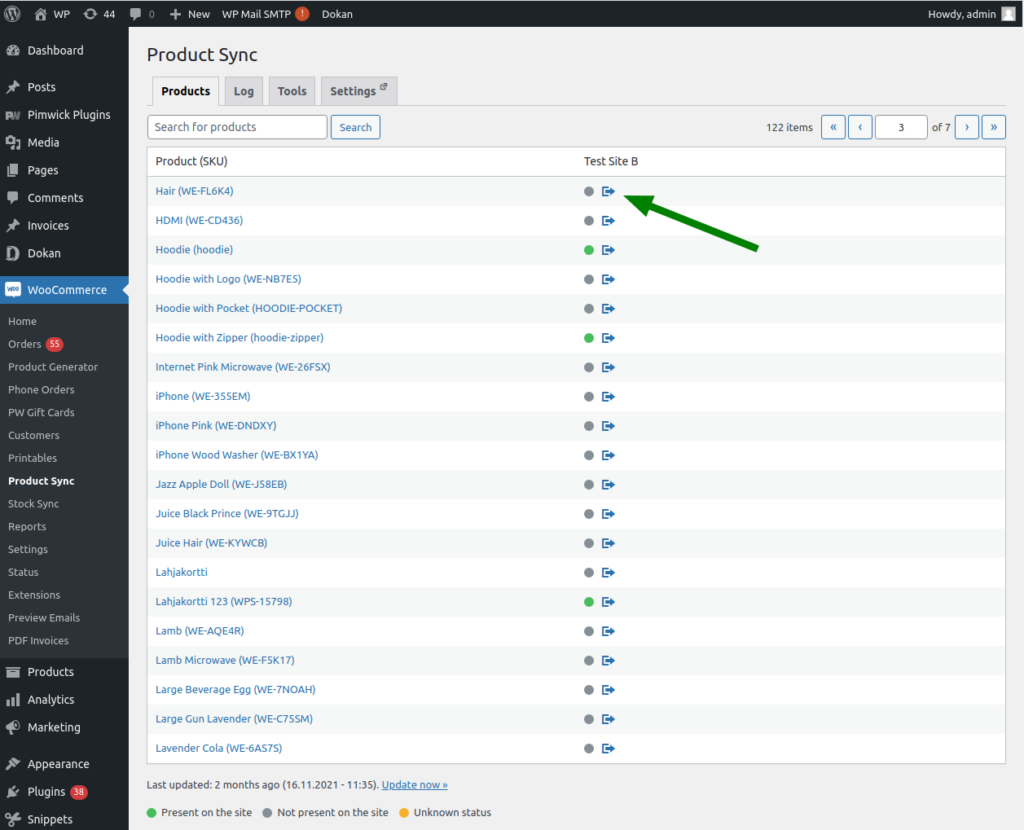
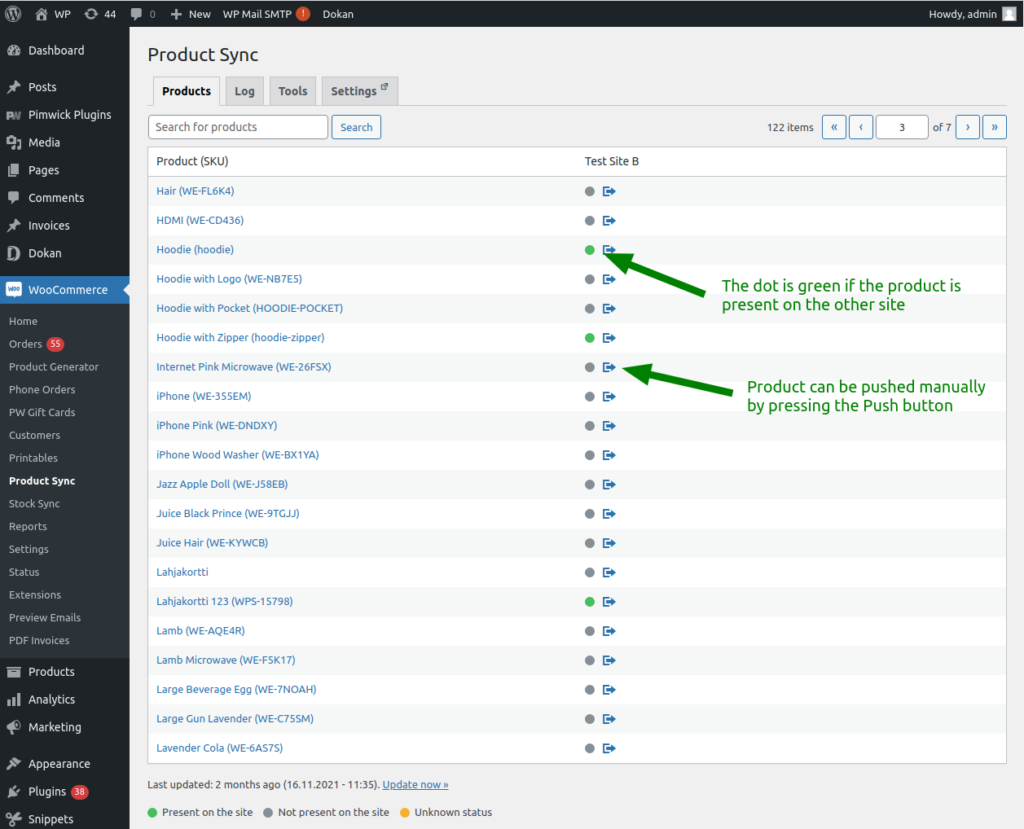
Report page is located in WooCommerce > Product Sync. Before viewing it you should update the report by running WooCommerce > Product Sync > Tools > Update Report. The update function will compare products by SKUs between sites and find matching products.
Green dots indicate products which are present on the other site. The dot is linked to the other site so it will take you to the other site’s admin edit page directly.
You can also push any products by pressing Push button.

6. Pushing all products
Product Sync can also push all products to the other site. Push All tool can be found at WooCommerce > Product Sync > Tools > Push All.
Please note that if you have manual mode active (syncable products are selected product by product), Push All will push only the selected products.
